You have a Perforce server and an on-going project. For communicating with your team you’re using Discord, but there’s not much visibility into the changelists being submitted. Discord’s built in webhooks are a great way to get automated messages and updates sent to a text channel in your server. I’ll go over how we can setup Perforce triggers and Discord webhooks to add some visibility into chagelist submits.
Enabling Discord Webhooks
Before we get started with setting up Perforce triggers, we need to enable Discord webhooks in a text channel that will receive the updates.
In Discord, create a new text channel or use an existing one.
- Right-click the text channel.
- Select the “Integrations” section.
- Select “Create Webhook”.
- Give the Webhook a proper name.
We don’t need the webhook URL yet, but keep in mind where it is located.
Simple Submit Trigger
First, we’ll setup a simple bash script to post a simple message in Discord which will say, “$USER submitted $CHANGE.” Create a directory somewhere where you can save any Perforce triggers you might create. I simply created a new directory under my projects directory to store the scripts in one location: /home/michael/projects/perforce-sripts.
cd ~/projects/perforce-scripts
Once you’re in the directory you want to save the script in, create a new bash script called submit-discord.sh. In that script copy and paste the following code:
#!/bin/bash

# The first argument is the changelist number.
CHANGE=$1
# The second argument is the username.
USER=$2

# POST the payload to Discord.
# The payload is a JSON string.
curl --header "Content-Type: application/json" \
     -d "{\"content\":\"$USER submitted change $CHANGE.\"}" \
     "https://discord.com/api/webhooks/VERY_LONG_ID_HERE"
Make sure to replace https://discord.com/api/webhooks/VERY_LONG_ID_HERE with the Webhook URL you created earlier.
To test the functionality, we can simply run a quick command ./submit-discord.sh 18 michael. In the text channel you designated, you should see a message appear, “michael submitted change 18.”
I know you’re probably thinking, “This isn’t that descriptive!” Don’t worry, we will get to that part. This was just to simply show you the functionality. For the most advanced submit trigger we will be using Python to create that script.
Perforce Triggers
To enable the automated message, we will need to attach the submit-discord.sh to a Perforce trigger. Triggers are scripts or programs called when a certain operation is performed. We will be using the change-commit trigger type which fires after a changelist has already been submitted.
To attach out script to the change-commit trigger type run the command p4 triggers which will use vim to open triggers configuration file. You will be prompted to supply the super user’s password. Add a line at the bottom of the file as follows:
# See 'p4 help triggers' for more information about triggers.

Triggers:
        submit_webhook change-commit //Flashpoint/... "/home/michael/projects/perforce-scripts/submit-discord.sh %change% %user%"
There are four fields to fill in, name, type, path, and command.
- name : The user-defined name of the trigger.
- type : The trigger type which defines when the script will be fired.
- path : This field is determined by the trigger type, but in our case a script executes when a user submits a changelist that contains files that match the determined path and pattern.
- command : The trigger for the Helix Server to run when the conditions are met.
Note: Make sure to replace the path and command with your specific values.
Advanced Submit Trigger
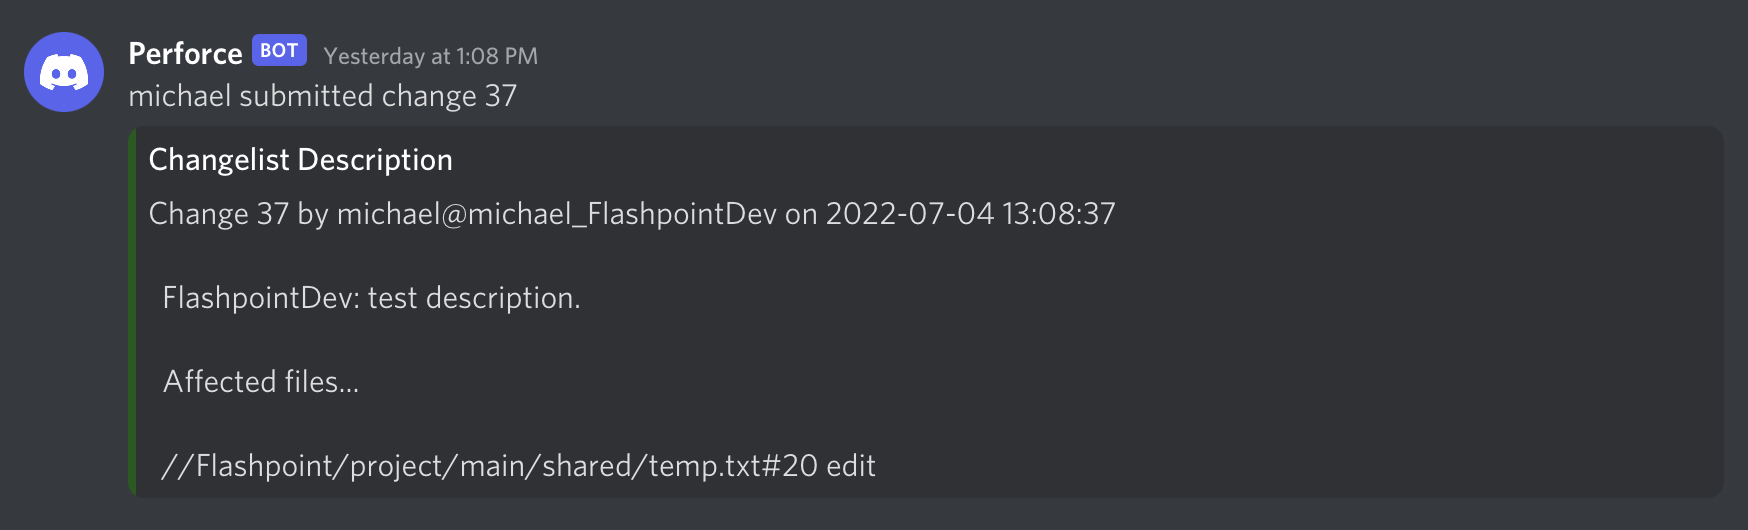
Now let’s get into the real meat. We will be using Python3, I specifically used Python 3.8, to create a script that will add a message into the text channel like the image at the top of this post. We’ll have to install a couple python packages before we get started.
Installing Python Packages
Installing P4Python Using pip
pip install p4python
Installing P4Python from a package
sudo apt install perforce-p4python3-python3.8
Installing python-discord-webhook
pip install discord-webhook
Writing the Python Script
Create a new file, and call it submit-discord.py. Open the file with your preferred editor and add the following script.
import sys
from discord_webhook import DiscordWebhook, DiscordEmbed
from P4 import P4
from datetime import datetime

# system arguments
CHANGE=sys.argv[1] # first argument
USER=sys.argv[2] # second argument


# P4 authentication
p4 = P4()
p4.password = 'superSecretPassword'
p4.user = 'super'
p4.connect()
p4.run_login()

# Get the changelist description
describe_dict = p4.run('describe', '-s', CHANGE)

def format_description(describe_dict):
  # format the description into a readable format
  def format_files():
    # format the files into a readable format
    # format: file#rev action
    depotFiles = describe_dict['depotFile']
    actions = describe_dict['action']
    rev = describe_dict['rev']
    string = ''
    limit = 3 # limits the amount of files it adds to the automated message.
    # I found the limit depends on the character limits set in embed messages in Discord.

    for i in range(len(depotFiles)):
      string += f'{depotFiles[i]}#{rev[i]} {actions[i]}\n'
      if i == limit:
        string += '...'
        break

    return string

  # format date into YYYY-MM-DD HH:MM:SS
  date = datetime.fromtimestamp(int(describe_dict['time']))
  change = describe_dict['change'] # changelist number
  user = describe_dict['user'] # user
  client = describe_dict['client'] # user's workspace
  description = describe_dict['desc'] # changelist description
  files = format_files()

  # format the description
  description_str = f"""
  Change {change} by {user}@{client} on {date}

  {description}
  Affected files...

  {files}
  """

  return description_str

discordBotName = 'Perforce'
description = format_description(describe_dict[0])
content = f'{USER} submitted change {CHANGE}'
url = 'https://discord.com/api/webhooks/VERY_LONG_ID_HERE'
webhook = DiscordWebhook(url=url, content=content, username=discordBotName)
embed = DiscordEmbed(title='Changelist Description', description=description, color=0x195919)
webhook.add_embed(embed)
response = webhook.execute()
Before we call this done, run p4 triggers once again and replace the last line.
# See 'p4 help triggers' for more information about triggers.

Triggers:
        submit_webhook change-commit //Flashpoint/... "python3 /home/michael/projects/perforce-scripts/submit-discord.py %change% %user%"
You can test the script the same way as before, but be sure the changelist and the user both exist.
python3 /home/michael/projects/perforce-scripts/submit-discord.py 18 michael
Conclusion
Now you’ll have an automated messaging setup for when someone on the project submits with a detailed description of the changes. This will be helpfull in allowing your team members more visibility into the on going changes in the project.
I hope you enjoyed reading this.
References
- https://www.perforce.com/manuals/p4sag/Content/P4SAG/chapter.scripting.triggers.html
- https://support.discord.com/hc/en-us/articles/228383668
- https://www.perforce.com/manuals/p4python/Content/P4Python/chapter.python.html
- https://pypi.org/project/discord-webhook/